



40 minutes ago
When the little pilgrim first stepped through Bone Bottom's eastern gate in 2026, The Marrow did not greet her with a welcome. It breathed heat, clicked with shell and bone, and hid half its treasures behind ledges that her first tools could not reach. Hollow Knight: Silksong had already taught her that a map was a promise, not a receipt. The Marrow, the second main area of Pharloom, made that lesson literal. It could not be fully explored on the first trip. The wise explorer kept pins close, marked every unreachable nook, and returned after earning the abilities that turned walls into roads.
? A Furnace With Three Doors
The Marrow lies beyond the east exit of Bone Bottom. Its tunnels crawl with Skull Scuttlers, Skull Brutes, Kiliks, Beastflies, Caranids, Hardbone Hoppers, Pilgrim Grovellers, and Pilgrim Pouncers. Many of these foes drop only Scraps; a limited few surrender Rosary. Early finances therefore depend on curiosity. Hidden Rosary deposits reward the traveler who pokes beneath molten shelves and behind quiet corners.
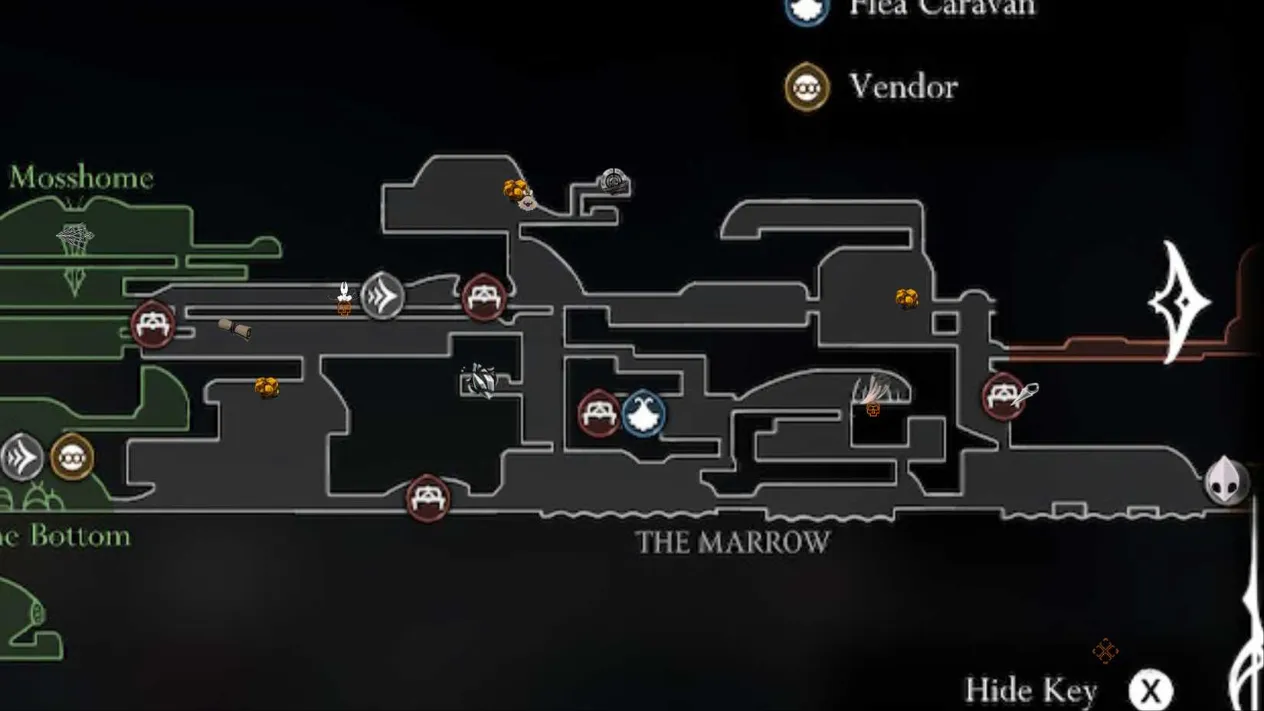
The region connects to three important map areas. The Mosslands link through the Bone Bottom exit and the Mosshome connection above. Deep Docks wait in the southeast corner. Hunter's March opens through the eastern exit above the Jail, but a strong enemy guards that road. The story guide's warning is blunt: Hunter's March can wait. The Marrow already offers enough danger for an early expedition.
? Friends In Hot Stone
The first familiar face is Sherma, found at the locked gate near the entrance. Exhausting their dialogue and opening the gate advances their quest. The trick is spatial rather than violent: the explorer circles around from the top and falls back down, then pulls the lever just above head height on the far side. Once the gate stands open, another talk sends Sherma onward.

Shakra appears near the Mosshome connection, far above the Bone Bottom exit. She matters twice over: as a companion in later battles and as the resident navigator and mapmaker. After the first conversation, she can move to Bone Bottom and sell wares that might otherwise be missed. Grindle waits in the Jail on the far east side. Freeing him is the key to reaching the Straight Pin above his cell, so the jail is not a room to skip.
? Collectibles In The Cracks
Collectibles are sparse and spread out. The Shard Pendant, a Charm, sits in the central skinny vertical room west of the Flea Caravan. The room is virtually unguarded, but the pendant nestles into the wall and easily slips past a first run.
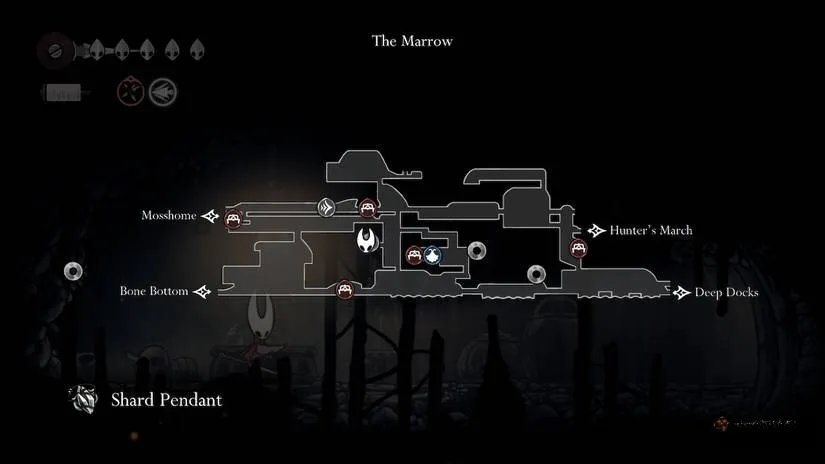
The Straight Pin is a trap item found directly above Grindle in the Jail. It must be equipped at a bench and can be remade each Rest with any Scraps in the inventory. The remaining collectibles require travel to Shellwood and the Cling Grip. Two of them are Memory Lockets. One rewards the Volatile Flintbeetles wish. The second waits in the topmost room east of the Flea location; several pilgrims come to life when the explorer enters, and defeating the mob rush grants access. The final prize is a Mask Fragment. Its location is technically in Deep Docks, but the entrance is in the Marrow's final southeast room. Climbing to the top-right corner triggers waves of trash mobs; clearing them opens the right-hand door.
? Wishes Worth The Sweat
Four known wishes can be completed or started in The Marrow. They give the return trip purpose.
Wish
Task
Giver
Reward
The Lost Fleas
Find all five fleas in Pharloom
Mooshka at the Flea Caravan
Access to the secret Flea Caravan area of Greymoor and Flea Brew
Garb of the Pilgrims
Defeat 12 pilgrims and take their robes
Wish Board
Beaded Rosary, 60 Rosary
Volatile Flintbeetles
Track and defeat three Volatile Flintbeetles and gather their stone
Wish Board
Memory Locket
The Terrible Tyrant
Defeat the Skull Tyrant boss
Wish Board
Heavy Rosary, 220 Rosary
⚔️ Two Bosses, Two Tempers
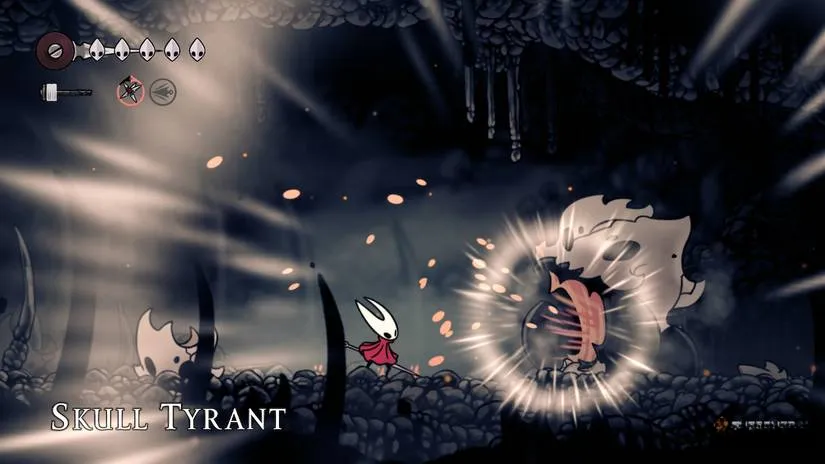
The Marrow holds two bosses: the Bell Beast and the Skull Tyrant. The Bell Beast is required for progress and opens the Bellways. The Skull Tyrant is not immediately accessible until the related wish, The Terrible Tyrant, is taken. That order matters. The Bell Beast first must be freed with the Silkspear and then defeated. Once sense is knocked into the beast, the explorer can take the Silk Heart upgrade, set up the Bellway location, sit on the bench east of the Bellway, and unlock the shortcut east of that bench toward the central chamber.
?️ The Ideal Path, Told Twice
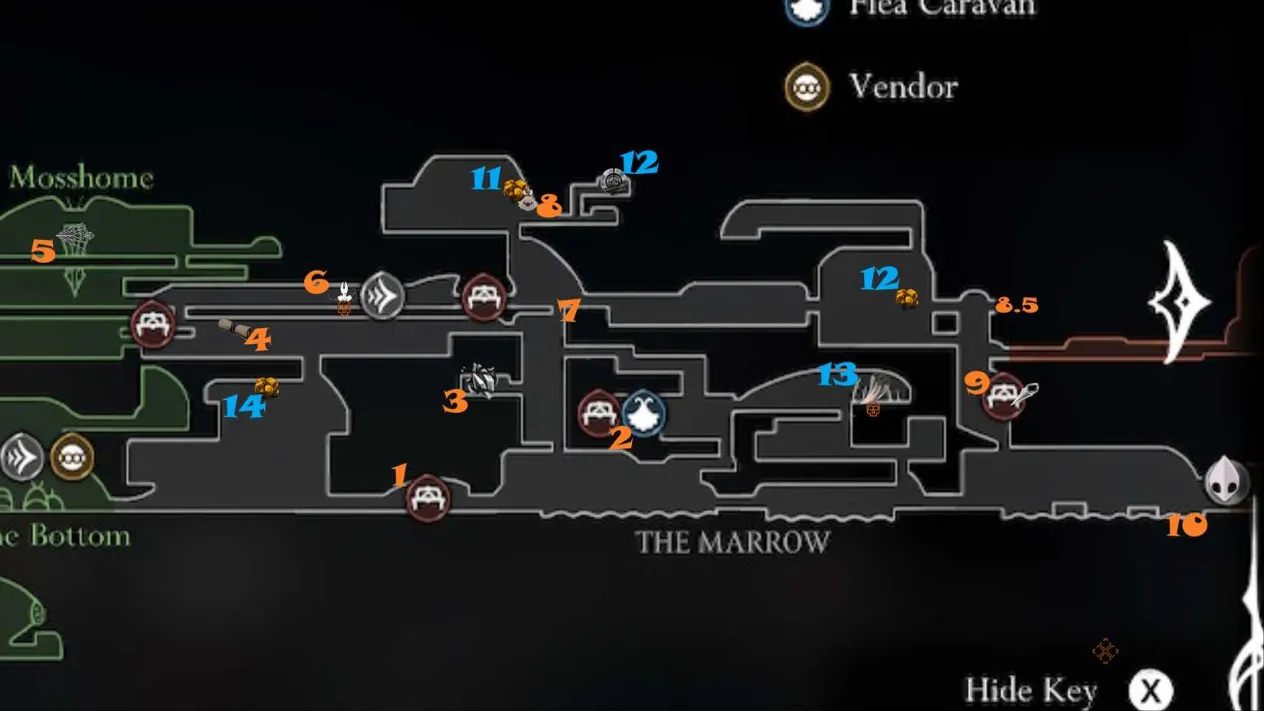
The Marrow is visited twice. The first visit follows the story and has ten main beats. The traveler enters, travels upward in the first room, circles around to unlock the gate, then heads east to the first bench. In the lava-filled room, a strange blue sign in the top-right corner points up to the Flea Caravan and the first optional wish. From there, the road winds northwest.
On the way, a downward detour after the Flea Caravan exit leads to the Shard Pendant in the far-left room halfway down. Back at the top, the explorer continues west and follows the sound of singing. Sherma sells maps of both visited areas, the Quill, and the Compass. Buying all of them is a kindness to future navigation.
Progress then demands a detour west and north through the Mosslands. The goal is the Silkspear upgrade at the northmost point. A signboard covered in musical notes marks the final approach. Returning east into The Marrow, the explorer follows signs shaped like >>> to the Bell Beast. After the beast is freed and defeated, the Bellway, bench, Silk Heart, and central shortcut fall into place.
A short detour north of the opened shortcut frees a Flea near the top of the northmost room. Then the route goes as far east as possible into a room with four exits. The first room holds free Rosary. The second should be avoided for now because it guards Hunter's March. The third leads to the Jail and the Straight Pin. The fourth points south toward Deep Docks. The first and third rooms are worth visiting before the southmost exit.
After Deep Docks, there is no reason to return to The Marrow until Cling Grip is acquired in Shellwood. At that point, the explorer returns to Bone Bottom, collects remaining wishes, and finishes the Marrow's loose ends: two final wish sidequests, the Skull Tyrant, the last Memory Locket, and the Deep Docks Mask Shard. In 2026, the route remains a tale of heat, patience, and the quiet joy of a pinned map finally turning complete.
Route planning is only half the journey; the other half is deciding where to start your own copy without overpaying. Whether you are after a digital key, a physical edition, or a seasonal discount, storefront prices shift often enough that a quick comparison can save more than a few Rosary beads.
DealNest gathers those listings and bundles in one place, making it easy to check game prices before committing. It is a handy stop for anyone turning a finished map into a fresh save file.
? A Furnace With Three Doors
The Marrow lies beyond the east exit of Bone Bottom. Its tunnels crawl with Skull Scuttlers, Skull Brutes, Kiliks, Beastflies, Caranids, Hardbone Hoppers, Pilgrim Grovellers, and Pilgrim Pouncers. Many of these foes drop only Scraps; a limited few surrender Rosary. Early finances therefore depend on curiosity. Hidden Rosary deposits reward the traveler who pokes beneath molten shelves and behind quiet corners.
The region connects to three important map areas. The Mosslands link through the Bone Bottom exit and the Mosshome connection above. Deep Docks wait in the southeast corner. Hunter's March opens through the eastern exit above the Jail, but a strong enemy guards that road. The story guide's warning is blunt: Hunter's March can wait. The Marrow already offers enough danger for an early expedition.
? Friends In Hot Stone
The first familiar face is Sherma, found at the locked gate near the entrance. Exhausting their dialogue and opening the gate advances their quest. The trick is spatial rather than violent: the explorer circles around from the top and falls back down, then pulls the lever just above head height on the far side. Once the gate stands open, another talk sends Sherma onward.
Shakra appears near the Mosshome connection, far above the Bone Bottom exit. She matters twice over: as a companion in later battles and as the resident navigator and mapmaker. After the first conversation, she can move to Bone Bottom and sell wares that might otherwise be missed. Grindle waits in the Jail on the far east side. Freeing him is the key to reaching the Straight Pin above his cell, so the jail is not a room to skip.
? Collectibles In The Cracks
Collectibles are sparse and spread out. The Shard Pendant, a Charm, sits in the central skinny vertical room west of the Flea Caravan. The room is virtually unguarded, but the pendant nestles into the wall and easily slips past a first run.
The Straight Pin is a trap item found directly above Grindle in the Jail. It must be equipped at a bench and can be remade each Rest with any Scraps in the inventory. The remaining collectibles require travel to Shellwood and the Cling Grip. Two of them are Memory Lockets. One rewards the Volatile Flintbeetles wish. The second waits in the topmost room east of the Flea location; several pilgrims come to life when the explorer enters, and defeating the mob rush grants access. The final prize is a Mask Fragment. Its location is technically in Deep Docks, but the entrance is in the Marrow's final southeast room. Climbing to the top-right corner triggers waves of trash mobs; clearing them opens the right-hand door.
? Wishes Worth The Sweat
Four known wishes can be completed or started in The Marrow. They give the return trip purpose.
Wish
Task
Giver
Reward
The Lost Fleas
Find all five fleas in Pharloom
Mooshka at the Flea Caravan
Access to the secret Flea Caravan area of Greymoor and Flea Brew
Garb of the Pilgrims
Defeat 12 pilgrims and take their robes
Wish Board
Beaded Rosary, 60 Rosary
Volatile Flintbeetles
Track and defeat three Volatile Flintbeetles and gather their stone
Wish Board
Memory Locket
The Terrible Tyrant
Defeat the Skull Tyrant boss
Wish Board
Heavy Rosary, 220 Rosary
⚔️ Two Bosses, Two Tempers
The Marrow holds two bosses: the Bell Beast and the Skull Tyrant. The Bell Beast is required for progress and opens the Bellways. The Skull Tyrant is not immediately accessible until the related wish, The Terrible Tyrant, is taken. That order matters. The Bell Beast first must be freed with the Silkspear and then defeated. Once sense is knocked into the beast, the explorer can take the Silk Heart upgrade, set up the Bellway location, sit on the bench east of the Bellway, and unlock the shortcut east of that bench toward the central chamber.
?️ The Ideal Path, Told Twice
The Marrow is visited twice. The first visit follows the story and has ten main beats. The traveler enters, travels upward in the first room, circles around to unlock the gate, then heads east to the first bench. In the lava-filled room, a strange blue sign in the top-right corner points up to the Flea Caravan and the first optional wish. From there, the road winds northwest.
On the way, a downward detour after the Flea Caravan exit leads to the Shard Pendant in the far-left room halfway down. Back at the top, the explorer continues west and follows the sound of singing. Sherma sells maps of both visited areas, the Quill, and the Compass. Buying all of them is a kindness to future navigation.
Progress then demands a detour west and north through the Mosslands. The goal is the Silkspear upgrade at the northmost point. A signboard covered in musical notes marks the final approach. Returning east into The Marrow, the explorer follows signs shaped like >>> to the Bell Beast. After the beast is freed and defeated, the Bellway, bench, Silk Heart, and central shortcut fall into place.
A short detour north of the opened shortcut frees a Flea near the top of the northmost room. Then the route goes as far east as possible into a room with four exits. The first room holds free Rosary. The second should be avoided for now because it guards Hunter's March. The third leads to the Jail and the Straight Pin. The fourth points south toward Deep Docks. The first and third rooms are worth visiting before the southmost exit.
After Deep Docks, there is no reason to return to The Marrow until Cling Grip is acquired in Shellwood. At that point, the explorer returns to Bone Bottom, collects remaining wishes, and finishes the Marrow's loose ends: two final wish sidequests, the Skull Tyrant, the last Memory Locket, and the Deep Docks Mask Shard. In 2026, the route remains a tale of heat, patience, and the quiet joy of a pinned map finally turning complete.
Route planning is only half the journey; the other half is deciding where to start your own copy without overpaying. Whether you are after a digital key, a physical edition, or a seasonal discount, storefront prices shift often enough that a quick comparison can save more than a few Rosary beads.
DealNest gathers those listings and bundles in one place, making it easy to check game prices before committing. It is a handy stop for anyone turning a finished map into a fresh save file.